How to Measure a Zipper Size? Easy Tips for Sewing Success
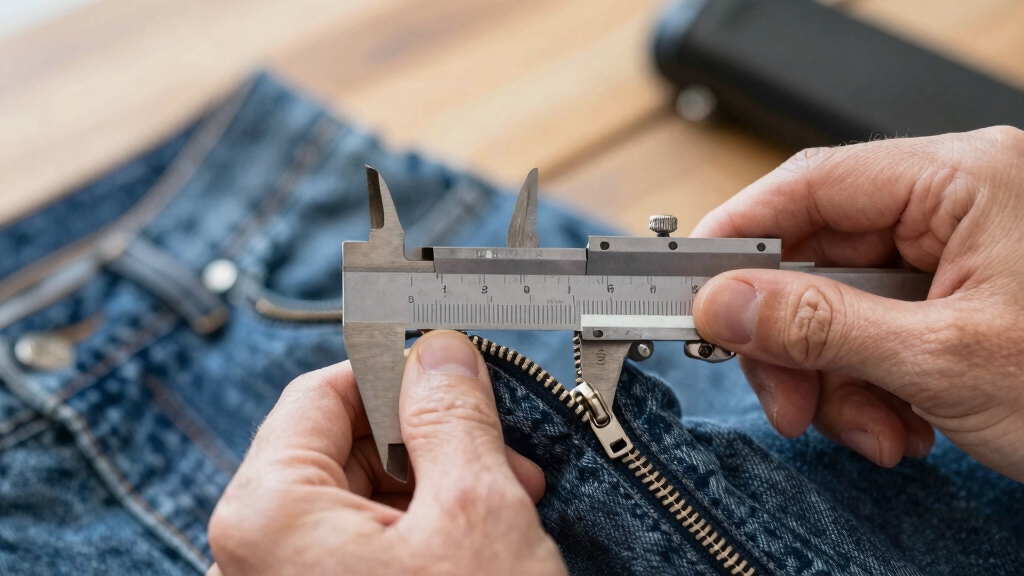
To measure a zipper size, fully close the zipper and lay it flat. Then use a digital caliper to measure the horizontal width of the closed teeth, excluding fabric tape.
Record the measurement in millimeters and round to the nearest standard size number (e.g., 5mm equals a #5 zipper). For length, measure from the top stop to the bottom stop or retainer box depending on zipper type.
Matching size guarantees proper strength and compatibility; more details explain precise sizing nuances.
Key Takeaways
- Fully close the zipper and lay it flat on a rigid surface to align teeth and avoid tape distortion.
- Use digital calipers to measure the horizontal width of the closed teeth, excluding fabric tape.
- Take multiple measurements at top, middle, and bottom sections and average for accuracy.
- Round the measured width in millimeters to the nearest standard size number (e.g., 5 mm ≈ #5 zipper).
- Confirm size by checking for embossed numbers on the back of the zipper slider as a quick reference.
Understanding Zipper Size Numbers
Although zipper sizes may seem arbitrary at first, they actually correspond directly to the approximate width of the zipper teeth measured in millimeters.
Zipper sizes reflect the approximate width of their teeth measured in millimeters, ensuring proper fit and function.
For example, a #5 zipper has teeth about 5mm wide. These size numbers, standardized globally by manufacturers like YKK, represent the closest standard measurement to the actual teeth width.
Lower numbers indicate thinner, lighter zippers, while higher numbers denote thicker, heavier ones. When you see a zipper number like #3 or #8, it reflects the teeth gauge, critical for matching the zipper to fabric weight and application. Understanding these measurements ensures proper compatibility and consistency across different uses.
This numerical system guarantees compatibility and consistency, preventing mismatches in size or tape fit across various applications, from delicate garments to heavy-duty covers. If the slider is missing or unmarked, you can determine the size by measuring the closed teeth width directly with a ruler.
Preparing the Zipper for Measurement
Understanding how zipper size numbers correspond to the actual tooth width sets the foundation for accurate measurement.
First, close the zipper fully to make certain teeth align properly and prevent distortion when measuring length or gauge.
Lay the zipper flat on a rigid surface to achieve precise alignment from top stop to bottom stop, minimizing tape interference. This approach is similar to how one should measure purse dimensions accurately to ensure precision.
Identify key components: exclude the slider pull tab and excess tape beyond stops. For separating zippers, note the retainer box instead of the bottom stop.
If dealing with multi-slider zippers, align both sliders at one end to capture the functional length accurately.
Before measuring, mark and stabilize the zipper as needed. Machine-baste or staystitch to maintain shape, making certain precise length measurement within tolerance guidelines.
Standard zipper lengths range from 7 to 22 inches, and selecting the appropriate length involves checking the garment and considering individual body proportions.
Tools Needed for Accurate Measurement
To measure zipper size accurately, you’ll want to gather a couple of essential tools. First up, grab a ruler or a digital caliper for measuring the width of the teeth. Then, you’ll need a tape measure to determine the length of the zipper.
Before you start measuring, make sure the zipper is fully closed and laid flat. This helps prevent any distortion that could throw off your measurements.
It’s also a good idea to focus on using metric units, as this aligns with standard sizing systems and helps ensure precision throughout your measurement process. Measuring the gauge by checking the horizontal width of the closed teeth in millimeters is essential for an accurate size determination measuring zipper size.
Essential Measuring Instruments
To get accurate zipper measurements, you need to line up the right tools before starting. Use a digital caliper for the highest precision in teeth width, measuring across closed teeth at their widest point.
For less frequent use, a standard caliper offers reliable analog accuracy, matching sizes like #3 at 4.15mm or #8 at 7.8mm. A ruler with both metric and imperial scales works for basic teeth width and length measurements on closed zippers but lacks fine precision.
A flexible tape measure handles longer zippers, measuring from top to bottom stops, ideal for jackets or bags. Measuring on a flat surface helps prevent distortions and ensures consistency.
Additional essentials include a flat surface to prevent distortion and reference charts for rounding measurements. It is also helpful to check the back of the slider for an embossed size number as this can quickly identify the zipper size without measuring.
These instruments guarantee precise sizing for repair or replacement tasks.
Preparing the Zipper
Before taking any measurements, prepare the zipper properly to guarantee accuracy. Fully close the zipper so the teeth interlock completely, preventing gaps that skew teeth width readings. Measuring the zipper teeth horizontally when zipped shut is essential to determine the correct zipper gauge.
Lay the zipper flat on a rigid surface to avoid distortion, ensuring the fabric tape stays excluded from measurements focused solely on the teeth. For broken zippers that won’t close, measure one side’s teeth width and double it.
Identify the zipper type: closed-end, open-end, or two-way, and align measurement endpoints accordingly, such as top and bottom stops or retainer box. Always exclude pull tabs and sliders from length measurements.
Repeat flattening and closure steps to verify consistency. Use metric units for precision, converting imperial values when necessary, and round measurements carefully to accommodate overlap in damaged zippers.
Metric Measurement Tools
Accurate measurement of a zipper demands reliable tools designed for precision and consistency.
You’ll need a flexible measuring tape for curved surfaces and a metal tailoring ruler for flat, precise assessments. Both tools should display metric units—centimeters—as the industry standard, with clear imperial conversions to handle various contexts. Using flexible measuring tapes ensures accuracy on non-linear surfaces like zipper teeth.
Lay the zipper flat on a clean, even surface to avoid distortions and make certain measurement accuracy from the top stop to the bottom stop. Focus solely on the teeth section, fully closing the zipper to prevent slider displacement.
Use seam gauges for repeated measurements, assuring adherence to tolerances: ±5 millimeters for zippers 30 cm or less, and ±2% for lengths over 120 cm. It is crucial to exclude the fabric tape from measurement to obtain the true zipper length.
Selecting professional-grade tools tailored to your project guarantees consistent, accurate zipper sizing.
Measuring the Width of Closed Teeth
When you measure the width of closed zipper teeth, you determine the distance across the fully engaged teeth in millimeters, excluding any tape.
Start by laying the zipper flat on a horizontal surface and closing it completely to make certain the teeth interlock fully.
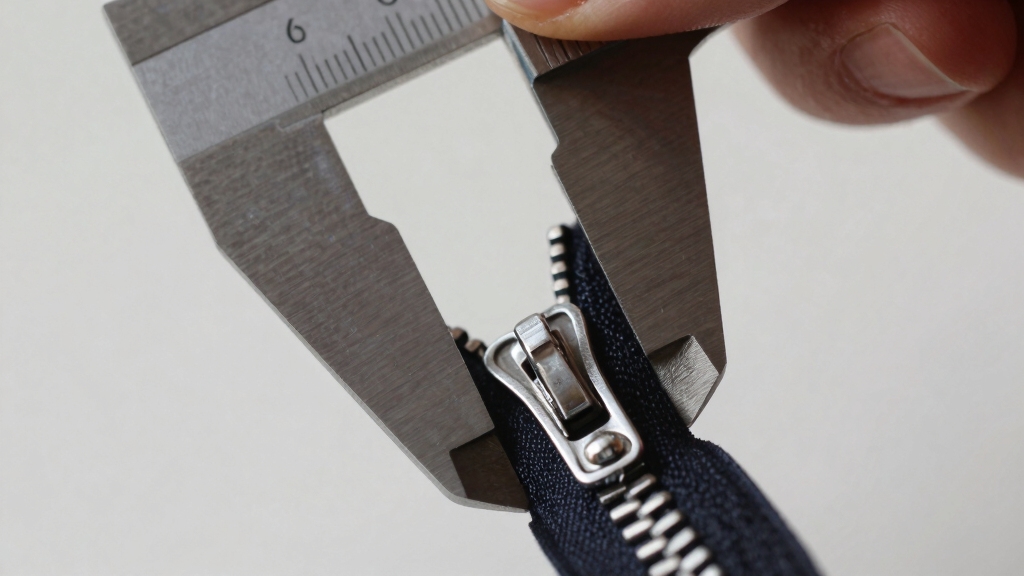
Use a digital caliper for the most precise reading, measuring horizontally at the teeth’s widest point.
If you don’t have a caliper, a ruler or measuring tape can suffice, but convert all measurements to millimeters.
Avoid pressing down on the teeth to prevent distortion.
If the zipper is broken, measure both sides separately and double the single-side width.
This measurement corresponds to standard sizes, such as #3 (4.15–4.50 mm) or #10 (10 mm), which indicate strength and suitability for specific applications.
Because different zipper materials like nylon, metal, and plastic have distinct standard sizes, it is important to match your measurement to the appropriate material category.
For accurate results, it is essential to measure all protruding parts, similar to how luggage size is measured including wheels and handles.
Rounding Measurements to Standard Sizes
You’ll typically round your measured zipper teeth width to the nearest standard size number, which corresponds to predefined millimeter ranges.
Measure zipper teeth width and round to the nearest standard size number for accurate sizing.
For example, if your closed teeth measure between 7.2 mm and 8.0 mm, you round to a #8 zipper size. Each size number reflects the approximate width in millimeters across the closed teeth, such as #3 at 4 mm or #5 at 6 mm. Regular maintenance and inspection help ensure the zipper functions smoothly and avoids issues like jammed locks.
When you measure, take the width precisely across the fully closed teeth and consult standard charts to identify the closest size. Slight deviations are normal due to zipper type variations, but always select the nearest standard size to maintain consistency. In some cases, the embossed number on the zipper slider back may not represent the actual size, so in-person measurement is essential for accuracy.
This rounding guarantees you categorize zippers accurately within small (#1-4), medium (#5-7), or large (#8-10) size ranges for appropriate applications.
Measuring the Length of Different Zipper Types
After identifying the correct zipper size by measuring the teeth width, the next step is determining the zipper length, which varies depending on the zipper type.
To measure accurately:
- For closed-end zippers, measure from the top of the top stop to the bottom of the bottom stop, excluding any excess fabric tape.
- For open-end (separating) zippers, measure from the top of the top stop to the bottom of the retainer box, leaving out the insertion pin.
- For two-way zippers, measure from the top stop to the lower retainer box, including both retainer boxes in the total length.
Lay the zipper flat and measure only the teeth section, using precise tools like digital calipers for reliable results. Proper measurement ensures compatibility when you need to replace zippers accurately during leather bag repairs.
Matching Zipper Size to Fabric and Project
When you’re picking out a zipper, it’s super important to match its gauge to the weight of your fabric. This way, you’ll keep everything flexible and durable. For those lightweight materials, opting for smaller sizes like #2 or #3 can really help everything blend together seamlessly. But if you’re working with medium to heavy fabrics, you’ll want to go for larger zippers to make sure you have enough strength.
The size number corresponds to the approximate closed-tooth width in millimeters, which helps you choose the right zipper size for your project. Also, don’t forget to consider the size of your project! Aligning the zipper size with the scale of what you’re making is key to ensuring it functions well and lasts. You definitely want to avoid any premature wear, right? Regular maintenance and protective measures can extend the life of your zipper and keep it looking and working like new.
Fabric Weight Considerations
Matching zipper size to fabric weight guarantees durability and functionality while maintaining aesthetic balance.
You need to select the zipper gauge based on the fabric’s thickness and intended wear. Here’s how to approach it technically:
- For lightweight fabrics like silk or chiffon, use #2 or #3 gauges (2-3mm teeth width). These thin zippers minimize bulk and prevent fabric distortion, ideal for blouses and children’s clothing.
- Medium-weight fabrics such as cotton or polyester require #4 to #5 gauges (4-5mm teeth width). These provide strength without overwhelming the garment, suitable for pants and heavier dresses. Always verify gauge and length before sewing to ensure the zipper functions properly and lasts. Using the right zipper size also helps maintain smooth functionality and reduces strain on the fabric.
- Heavy-duty fabrics, including outdoor gear or thick jackets, demand #7 to #10 gauges (7-10mm teeth width). Metal zippers at these sizes ensure ruggedness and resist breakage under stress.
Always make certain zipper gauge precisely with fabric weight to avoid premature failure or aesthetic imbalance.
Project Scale Alignment
In selecting a zipper size, you must align it precisely with both the fabric’s characteristics and the overall scale of your project to guarantee peak performance and aesthetic coherence. Choosing materials with appropriate durability can significantly impact the longevity and function of the final product.
For small-scale projects like cushions or children’s accessories, thinner zippers such as #2 or #3 (2-4mm) secure proportionality and reduce material stress.
Medium-scale items, like backpacks and jackets, typically require #5 (6mm) zippers, balancing durability with fabric weight.
For large-scale applications, like heavy-duty bags or outerwear, choose #8 or larger (9-10mm) zippers to distribute stress effectively and maintain structural integrity.
Consider experimental variations only after testing on samples to avoid functional or visual imbalance.
Matching zipper gauge to both fabric weight and project size optimizes usability and maintains clean, intentional design lines across all scales.
Additionally, selecting the correct zipper type and function is crucial to ensure the zipper meets the garment or project’s opening and closing needs.
Identifying Zipper Size by Slider Markings
Look closely at the back of the zipper slider to identify its size, as the flat side typically displays a number that indicates the zipper’s gauge. This marking often appears as a single digit or a number-letter code, such as 5, 5C, or 5CN, where the number corresponds to the approximate width of the teeth in millimeters.
Look at the zipper slider’s flat back for numbers indicating the size and gauge of the zipper teeth.
For instance, a “5” means the teeth measure about 5–6 mm wide.
- Identify the first digit on the slider’s flat side; it indicates size.
- Check for additional letters like C, M, or V, which specify coil, metal, or Vislon types.
- Use magnification if markings are faint, and verify size by comparing with standard tooth widths.
This method offers a precise, quick way to determine zipper size. Additionally, the size number helps indicate the strength and durability expected for the intended application.
Tips for Ensuring Precise Zipper Measurement
Although measuring a zipper’s size might seem straightforward, achieving precise results requires careful attention to several technical factors.
Always use calibrated digital calipers for superior precision, ensuring the zipper lies flat without twists. Measure the fully closed zipper horizontally, excluding fabric tape to capture only tooth width.
Take two to three measurements at consistent points: top, middle, bottom, and average them to offset manufacturing variations. If the zipper is worn or broken, measure one side and double the value, applying rounding protocols for standard size alignment.
Maintain the slider’s position at measurement points to avoid tooth spacing fluctuations. Accounting for wear and using metric or imperial units with proper conversion further enhances accuracy.
It is also crucial to use a matching slider size because slider compatibility depends on the zipper number for proper function. These disciplined steps guarantee reliable, reproducible zipper sizing for exact component matching.
Frequently Asked Questions
Can Zipper Size Affect Washing Machine Safety for Garments?
Think of zipper size as a key fitting a lock. Too big or too small, and problems arise.
Yes, zipper size affects washing machine safety. Larger zippers can snag or scratch the drum, while smaller ones may get caught in machine parts.
Ensuring zippers close fully and fit securely prevents fabric damage and machine abrasion. You should also use protective measures like mesh bags to shield delicate garments and maintain your machine’s longevity.
How Do Different Zipper Materials Impact Durability?
Different zipper materials directly impact durability based on their composition and environment. Metal zippers, especially brass, offer superior tensile strength and wear resistance, making them ideal for heavy-duty uses.
However, they need more maintenance to prevent rust in humid or salty conditions. Plastic zippers resist corrosion, UV, and dirt better, requiring less upkeep but lack the strength for high-stress applications.
Choosing depends on your garment’s load and exposure needs.
Are Waterproof Zippers Sized Differently Than Regular Ones?
No, waterproof zippers aren’t sized differently from regular ones. Both use the same numerical sizing system based on tooth width in millimeters.
You’ll find a #5 zipper has roughly 5mm-wide teeth, whether it’s waterproof or standard. Waterproof models add sealed tapes and coatings but maintain identical tooth measurements and size designations.
This ensures compatibility and consistent sizing across zipper types despite material and structural differences.
What Is the Best Method to Replace Broken Zipper Teeth?
To tackle torn teeth, try tailoring a tiny tooth substitute. Cut a small U-section from a cotton bud or better yet, use a brass clip for sturdiness.
Position this piece precisely where teeth are missing, then sew securely several times near the zipper chain using matching thread.
Strengthen the stitch with cyanoacrylate adhesive to seal the fix. Finally, carefully reattach the slider and reinstall stoppers to stabilize the zipper’s structure.
How Do Zipper Sizes Vary Across International Brands?
You’ll find zipper sizes vary subtly across international brands due to differing measurement standards and material focus.
For instance, YKK uses gauge measurements tailored to item functionality, while Leatherbox USA and Maggieframe list specific tooth widths for the same size numbers.
European brands may adhere strictly to ISO standards, but metal zipper sizes can differ more.
Always check each brand’s technical specs, as teeth width, strength ratings, and material types influence size classification globally.
Apply These Zipper Measuring Tips to Your Next Project
Now that you know how to prepare your zipper, measure its width and length accurately, and identify size markings, you can confidently select the perfect zipper for your project.
Remember to use proper tools, round measurements carefully, and match the zipper size to your fabric’s needs.
By measuring precisely, choosing wisely, and fitting properly, you guarantee durability, functionality, and style in every sewing endeavor. Master these steps, and your zipper work will always zip smoothly.