How to Personalize a Backpack: Easy DIY Ideas
You can personalize your backpack by adding pins, patches, or fabric paint for instant, unique visuals.
Select colors, materials, and hardware like metal zippers for durability and style.
Use heat-transfer techniques with tools like Cricut to apply precise designs.
Enhance safety by integrating reflective strips strategically.
Finally, customize with high-resolution prints or logos, considering practical details like hidden compartments and water-resistant decals.
Exploring these options will help you create a backpack that’s truly your own.
Key Takeaways
- Attach pins, iron-on patches, or fabric paint for quick and creative backpack decoration.
- Choose fabric colors and hardware like zippers or buckles to enhance style and durability.
- Use Cricut and heat-transfer vinyl for precise and custom artwork application with proper pressing techniques.
- Add reflective tape or custom zipper pulls to increase visibility and safety in low-light conditions.
- Upload high-resolution designs for custom printing and consider water-resistant decals for lasting personalization.
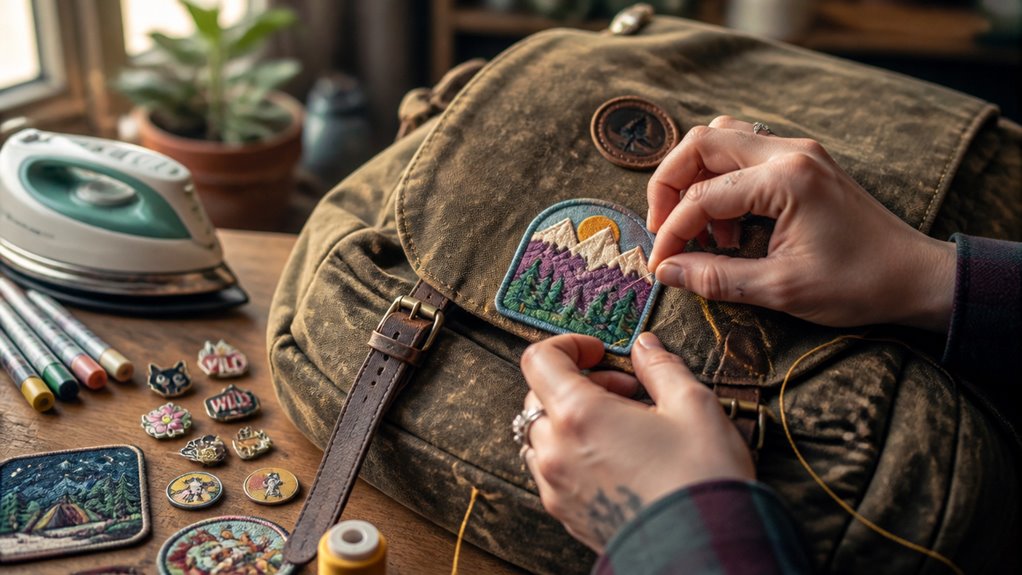
Choose Simple Decorative Upgrades for Custom Backpacks
When you want to quickly jazz up your backpack without complicated tools, simple decorative upgrades offer an effective solution.
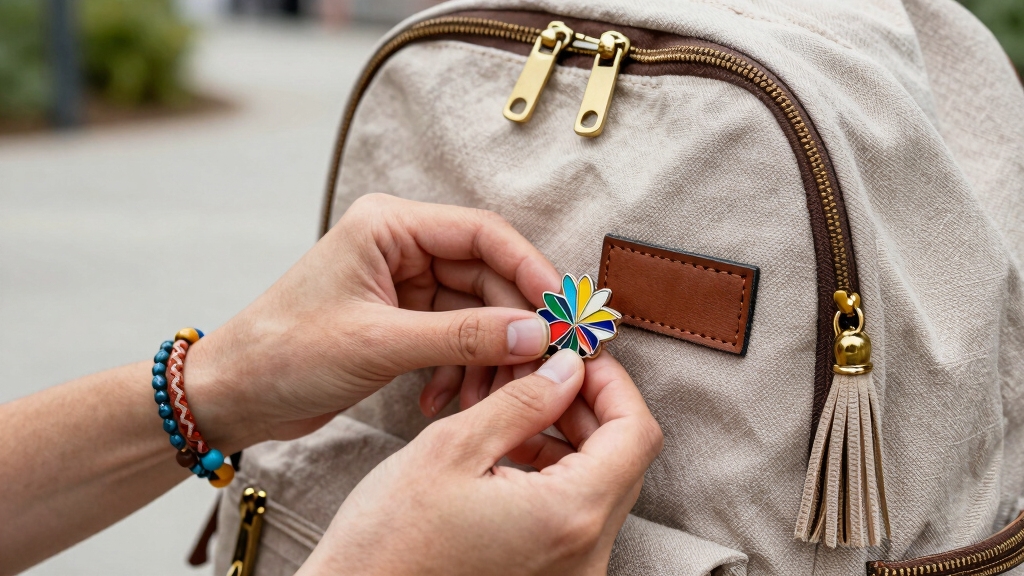
Start by attaching pins, patches, or small accessories to instantly enhance your bag’s look. Iron-on patches provide a fast, no-fuss personalization method: just position, press, and cool.
Attach pins or iron-on patches for an easy, instant backpack upgrade that adds personality without hassle.
If you prefer more control, fabric paint lets you create intricate designs or vibrant patterns tailored to your style.
For a tactile upgrade, consider adding fabric swatches, appliqués, tassels, or mini plush charms, which bring texture and depth.
You can also hand-draw directly onto the fabric for a unique artistic touch. Each option requires minimal equipment but delivers maximum visual impact, allowing you to innovate and customize your backpack quickly and efficiently.
Canvas fabric’s durability and strong surface make it ideal for long-lasting customization that withstands daily use.
Pick Colors, Materials, and Hardware for Your Backpack
Beyond decorative elements, selecting the right colors, materials, and hardware shapes your backpack’s overall look and durability.
Start by choosing fabric colors that complement your style. Whether you prefer bold contrasts or subtle tones, color sets the visual foundation.
Next, consider materials: nylon offers lightweight resilience, canvas provides rugged texture, and leather adds premium durability. Each impacts wear resistance and maintenance differently.
Hardware, including zippers, buckles, and clasps, isn’t just functional; it defines your bag’s tactile experience and aesthetic.
Opt for metal hardware for strength and a polished finish or plastic for lighter weight and modern flair.
Combining these elements strategically lets you innovate beyond standard designs. This achieves a personalized backpack that balances style, longevity, and usability tailored precisely to your needs.
Additionally, understanding fabric denier can help you choose the right balance of durability and weight for your customized backpack.
Use Heat-Transfer and Cricut Techniques to Customize Backpacks
Although customizing backpacks with heat-transfer and Cricut techniques requires some specialized tools, you’ll find the process straightforward and rewarding.
Start by designing your image or text and use the Cricut to cut iron-on vinyl precisely.
Remember to mirror your design before cutting to ensure correct orientation.
After weeding excess vinyl, position it on the backpack fabric.
Use an EasyPress Mini or heat press with a protective sheet to apply even heat and pressure.
Allow the design to cool before peeling the carrier sheet for lasting adhesion.
Follow these key steps for success:
- Mirror your design before cutting.
- Weed vinyl carefully to remove unwanted parts.
- Use a pressing mat inside the backpack for firm, even pressure.
- Follow heat and timing guidelines specific to your material.
For accurate customization, consider measuring the backpack’s dimensions precisely using flexible measuring tape to ensure your design fits perfectly.
Add Safety and Reflective Features to Your Custom Backpack
Frequently overlooked, safety and visibility upgrades can markedly enhance your backpack’s functionality while adding a bold design element.
Start by integrating reflective tape or strips, which you can sew or securely attach to high-visibility areas like shoulder straps and front panels.
Opt for materials with proven reflectivity to maximize low-light visibility.
Custom zipper pulls can also boost safety by improving grip and adding subtle reflective accents.
When positioning these features, focus on spots exposed to oncoming light sources for peak effect.
Use reinforced stitching or strong adhesives designed for fabric to guarantee durability.
These additions not only elevate your backpack’s style but also provide practical benefits during nighttime or poor weather conditions.
This merges safety with innovative personalization in an efficient, user-friendly way.
For added protection and easy identification, consider applying water-resistant stickers or vinyl decals that maintain visibility even in adverse weather.
Personalize Your Backpack With Custom Printing and Logos
After enhancing your backpack’s safety features, you can elevate its identity through custom printing and logos. Upload your favorite artwork, team emblem, or unique design files to personalize your bag precisely.
Custom printing platforms let you choose placement: front pocket, main panel, or strap, ensuring your design stands out. Consider these key points:
- Use high-resolution images for crisp, vibrant prints.
- Select color and hardware options to complement your design.
- Opt for durable printing techniques that resist fading and wear.
- Leverage customization services for bulk orders like school groups or teams.
Additionally, incorporating hidden compartments into your personalized design can enhance both security and functionality without compromising style.
Frequently Asked Questions
How Do I Clean and Maintain My Personalized Backpack?
You should spot-clean your personalized backpack with mild soap and a soft cloth to preserve designs and materials.
Avoid harsh chemicals or bleach, which can damage fabric and custom prints. For heat-transfer or iron-on vinyl, use gentle pressure when cleaning.
Air-dry your backpack away from direct sunlight to prevent fading. Regularly check for loose patches or hardware, and re-press iron-on designs if needed to maintain durability and vibrant appearance.
Can I Remove or Change Decorations After Applying Them?
You might think you can easily remove or change decorations, but it depends on the method you used.
Iron-on vinyl and heat-transfer designs usually bond permanently; removing them risks damaging the fabric.
Pins, patches, and accessories are more flexible. They can be swapped or repositioned with ease.
For a clean change, focus on detachable elements or use fabrics and adhesives designed for easy removal. This ensures your backpack stays fresh and personalized without hassle.
What Tools Do I Need for Hand-Painting Designs on Fabric?
You’ll need fabric paints designed for textiles, fine and broad brushes for detail and coverage, a palette for mixing colors, and water for cleaning brushes.
Use a fabric medium if your paint isn’t already formulated for fabric to improve flexibility and adhesion.
Prepare your workspace with protective coverings, and have a stencil or pencil for sketching your design.
Finally, place a piece of cardboard inside the backpack to prevent paint bleed-through.
How Do I Prevent Heat-Transfer Designs From Peeling or Fading?
Did you know 75% of heat-transfer failures come from improper pressing? To prevent peeling or fading, always flatten wrinkles and lightly moisten the fabric before pressing.
Use a pressing mat or folded towel inside for even pressure. Apply heat at the recommended temperature and time for your material.
Protect the design with parchment or Teflon sheets. Consider re-pressing after removing carrier sheets to fully secure the transfer.
Are There Any Backpack Materials That Don’t Work Well With Customization?
Yes, certain backpack materials don’t work well with customization, especially heat-transfer methods.
For example, nylon and polyester blends with shiny or slick coatings can repel adhesives and paints, causing poor adhesion or peeling.
Avoid highly textured fabrics like mesh or loosely woven materials, as they don’t provide a stable surface.
Always test on a small area first, and consider fabric-specific techniques or alternative customization like patches or pins for tricky materials.
Make Your Backpack More Stylish and Practical
By combining simple decorative upgrades with smart material and hardware choices, you can truly make your backpack one of a kind.
Using heat-transfer and Cricut techniques adds a tech-savvy touch, while safety features keep you visible and secure.
Don’t overlook custom printing to showcase your unique style.
With these innovative steps, personalizing your backpack is a piece of cake, giving you a practical, stylish carry-all that stands out from the crowd.